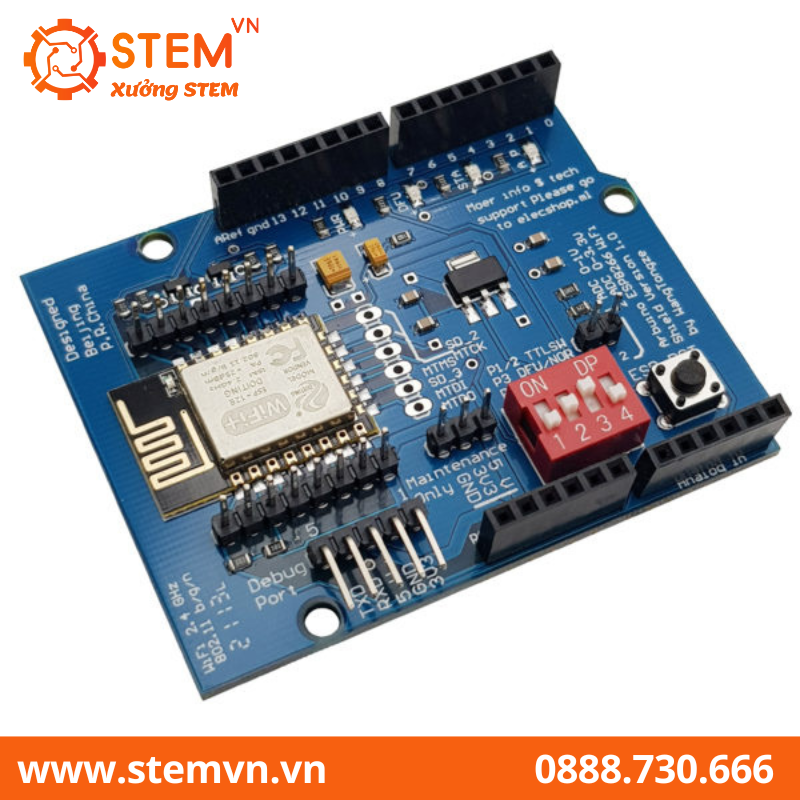
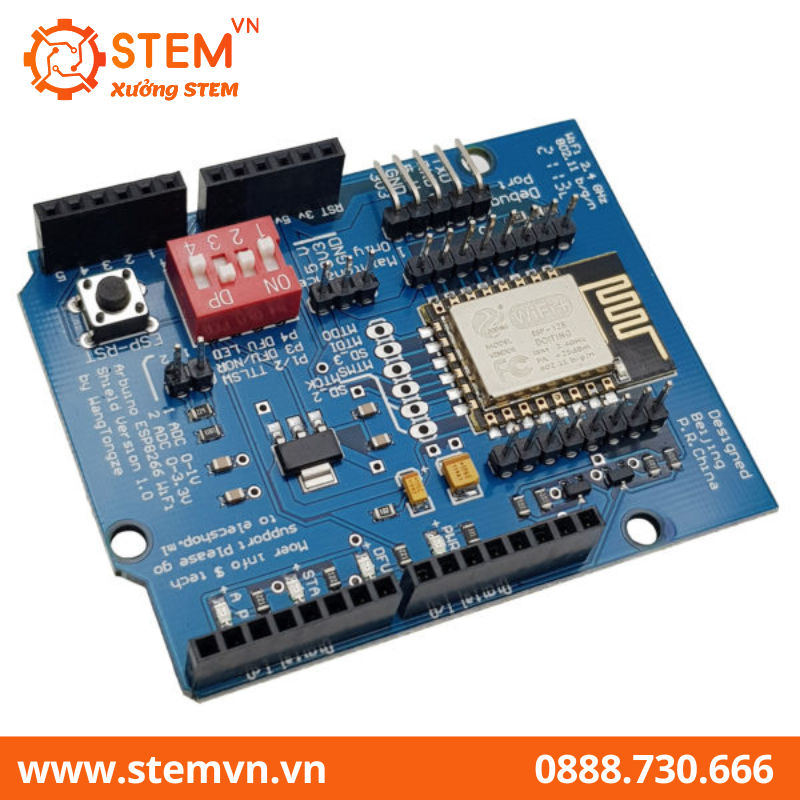
Arduino ESP8266 Wifi Shield
Mã sản phẩm: (Đang cập nhật...)
Thương hiệu: cập nhật
Còn hàng
120.000₫


Freeship đơn hàng từ 500k

Kiểm tra khi nhận hàng

Hỗ trợ khách hàng 24/7
- Thông tin sản phẩm
- Hướng dẫn
Arduino ESP8266 Wifi Shield được thiết kế dạng Shield Arduino nên có thể kết nối dễ dàng với hầu hết các mạch Arduino hiện nay để thực hiện các ứng dụng với module wifi esp8266 như bật tắt thiết bị qua wifi, thu thập dữ liệu qua wifi, báo động wifi, và hầu hết các ứng dụng IoT hiện nay.
Arduino ESP8266 Wifi Shield được tích hợp mạch nguồn riêng giúp ESP8266 hoạt động ổn định, đồng thời thiết kế Pin Out dạng rào cho tất cả các chân GPIO của ESP8266 giúp sử dụng dễ dàng, các chân GPIO đều có gắn thêm điện trở có chức năng chuyển mức tín hiệu giao tiếp 5V – 3V3 giữa Arduino và ESP8266.
THÔNG SỐ ARDUINO ESP8266 WIFI SHIELD
- Arduino ESP8266 Wifi Shield
- Module chính: Wifi SoC ESP8266 V12E
- Thiết kế dạng Shield chuẩn chân Arduino.
- Cấp nguồn từ các chân nguồn của Arduino.
- Pin Out đầy đủ các chân của ESP8266 V12E.
- Tích hợp Switch thiết lập chế độ giao tiếp với Arduino, chế độ nạp Firmware.
- Tích hợp các Led PWR, DFU, AP, STA.
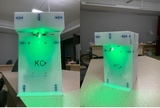
HÌNH ẢNH THỰC TẾ
———————CODE THAM KHẢO———————-
Phát:
/* Cắm cable kết nối
 * Mở Device Manger để xem port
 * Vào Tools -> Board -> NodeMCU 1.0 (ESP-12E Module)
 * Vào Tools -> Port -> Chọn Port kết nối.
 * Nạp code xong dùng điện thoại có kết nối Wifi truy cập vào wifi có tên NSHOP, mật khẩu: 12345678
 *
 */

#include <ESP8266WiFi.h>
#include <WiFiClient.h>
#include <ESP8266WebServer.h>

const char *ssid = "NSHOP";
const char *password = "12345678";
int stateLED = LOW;

ESP8266WebServer server(80);

void handleRoot() {
  response();
}

void handleLedOn() {
  stateLED = HIGH;
  digitalWrite(4, stateLED);
  digitalWrite(5, stateLED);
  response();
}

void handleLedOff() {
  stateLED = LOW;
  digitalWrite(4, stateLED);
  digitalWrite(5, stateLED);
  response();
}
const String HtmlHtml = "<html><head>"
                        "<BODY align="center">"
                        "<meta name="viewport" content="width=device-width, initial-scale=1" /></head>";
const String HtmlHtmlClose = "</html>";
const String HtmlTitle = "<h1>NamVietGroup</h1><br/>
";
const String HtmlLedStateLow = "<big>LED is now <b>OFF</b></big><br/>
";
const String HtmlLedStateHigh = "<big>LED is now <b>ON</b></big><br/>
";
const String HtmlButtons =
  "<a href="LEDOn"><button style="display: block; width: 100%;">ON</button></a><br/>"
  "<a href="LEDOff"><button style="display: block; width: 100%;">OFF</button></a><br/>";

void response() {
  String htmlRes = HtmlHtml + HtmlTitle;
  if (stateLED == LOW) {
    htmlRes += HtmlLedStateLow;
  } else {
    htmlRes += HtmlLedStateHigh;
  }

  htmlRes += HtmlButtons;
  htmlRes += HtmlHtmlClose;

  server.send(200, "text/html", htmlRes);
}

void setup() {
  delay(1000);
  Serial.begin(115200);
  Serial.println();

  WiFi.softAP(ssid, password);

  IPAddress apip = WiFi.softAPIP();
  Serial.print("visit:
");
  Serial.println(apip);
  server.on("/", handleRoot);
  server.on("/LEDOn", handleLedOn);
  server.on("/LEDOff", handleLedOff);
  server.begin();
  Serial.println("HTTP server beginned");
  pinMode(4, OUTPUT);
  digitalWrite(0, stateLED);
  pinMode(5, OUTPUT);
  digitalWrite(1, stateLED);
}

void loop() {
  server.handleClient();
}
Thu:
/* Cắm cable kết nối
 * Mở Device Manger để xem port
 * Vào Tools -> Board -> NodeMCU 1.0 (ESP-12E Module)
 * Vào Tools -> Port -> Chọn Port kết nối.
 * Nạp code.
 * Mở Serial Monitor chọn Both NL & CR, baud 115200.
 * Bấm nút reset trên module
 */

#include <ESP8266WiFi.h>

const char* ssid = "Linh Kien Dien Tu NSHOP";// wifi muốn kết nối------------------------------------------
const char* password = "dientuchatluong";

int ledPin = 13; // GPIO13
WiFiServer server(80);

void setup() {
  Serial.begin(115200);
  delay(10);

  pinMode(ledPin, OUTPUT);
  digitalWrite(ledPin, LOW);

  // Connect to WiFi network
  Serial.println();
  Serial.println();
  Serial.print("Connecting to ");
  Serial.println(ssid);

  WiFi.begin(ssid, password);

  while (WiFi.status() != WL_CONNECTED) {
    delay(500);
    Serial.print(".");
  }
  Serial.println("");
  Serial.println("WiFi connected");

  // Start the server
  server.begin();
  Serial.println("Server started");

  // Print the IP address
  Serial.print("Use this URL to connect: ");
  Serial.print("http://");
  Serial.print(WiFi.localIP());
  Serial.println("/");

}

void loop() {
  // Check if a client has connected
  WiFiClient client = server.available();
  if (!client) {
    return;
  }

  // Wait until the client sends some data
  Serial.println("new client");
  while(!client.available()){
    delay(1);
  }

  // Read the first line of the request
  String request = client.readStringUntil('r');
  Serial.println(request);
  client.flush();

  // Match the request

  int value = LOW;
  if (request.indexOf("/LED=ON") != -1)  {
    digitalWrite(ledPin, HIGH);
    value = HIGH;
  }
  if (request.indexOf("/LED=OFF") != -1)  {
    digitalWrite(ledPin, LOW);
    value = LOW;
  }

// Set ledPin according to the request
//digitalWrite(ledPin, value);

  // Return the response
  client.println("HTTP/1.1 200 OK");
  client.println("Content-Type: text/html");
  client.println(""); //  do not forget this one
  client.println("<!DOCTYPE HTML>");
  client.println("<html>");

  client.print("Led pin is now: ");

  if(value == HIGH) {
    client.print("On");
  } else {
    client.print("Off");
  }
  client.println("<br><br>");
  client.println("<a href="/LED=ON""><button>Turn On </button></a>");
  client.println("<a href="/LED=OFF""><button>Turn Off </button></a><br />");
  client.println("</html>");

  delay(1);
  Serial.println("Client disonnected");
  Serial.println("");

}
Xem thêm
Thu gọn
Xin mời nhập nội dung tại đây